We’ve Moved!!
We outgrew this site and have moved on to bigger and better things, so click the image below or look for us at www.makingmodernmemories.com.
Stash!!
As a quilter, today I had a great moment. The office-to-sewing studio project is still in progress, and today I decided to clean out the three-drawer chest that will soon become an over-sized ironing/cutting table and house my fat quarters and yardage.
My fat quarters, because I didn’t have that many, were in the meantime being stored in a large plastic container. As I brought fat quarters home, I would just toss them in the container. Little by little, sale by sale, and swap by swap, my stash has grown.
The top drawer of the chest is now filled with fat quarters. I almost had a tear in my eye when I realized that I actually have a stash now. I know there isn’t some magic number that means you have achieved Stash Status, but for so long I felt stashless. It’s only been a year since I started taking quilting seriously, and I am a quilter on a tight budget.
The yardage (because I get it at such good prices) is even more impressive. I filled the entire bottom drawer with pieces that are 1/2 to 1 yard in size, and the overflow (mostly stuff I will be looking to unload over the next year) is staying on a shelf in the closet.
So, here’s my stash (and there is always room for more!!):
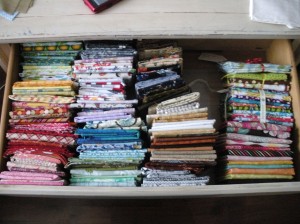 This is the top drawer where most of my fat quarters are stored. I have them somewhat organized by color. I printed off a handy, easy tutorial on folding fat quarters, so I might spend the rest of the snow day folding them to be more uniform (if Aaron lets me). The row to the right are bundles of collections.
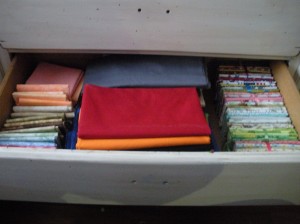 This is the middle drawer. To the left are my blender fabrics. The middle is a stack of Kona solids, and the right side is all bundles of collections (mostly the premium collections from JoAnn’s).
 This is the bottom drawer, the one I’m still mulling over and contemplating. Right now, my yardage is just stacked in there, but I’d really like to figure out a way that I can fold it so I can fit it in and see all the different fabrics. Kind of like the fat quarters. Part of the joy of owning fabric is looking at it and just enjoying it.
So yesterday we had a guild meeting for the Atlanta Modern Quilt Guild. We had a GREAT turn out, and I was thrilled because we had two designers as guest speakers. Jessica Swift is a surface designer and painter and she has her own line of fabric through Red Rooster. Her friend, Khristian Howell is also a designer and has several lines of Fabric through Robert Kaufman (and Anthology). Both were very interesting and we all liked hearing about the process and how fabric comes to life.
Actually, hearing about their career paths very much reminded me of my time working as a creative director for a fundraising company, when I was designing product. We used to buy artwork from artists, just like Jessica and Khristian. Their work is much more exciting, though.
Both brought fabric for us to buy, and I was sure to snatch up my fair share:
 This is a bundle from Khristian’s Anthology for Robert Kaufman line. I LOVE it. The colors and designs are amazing. She has another line coming out in a few months called Bryant Park, and I can’t even express how excited I am for it. The color combinations scream me.
 This is my stack of fat quarters from Jessica. I already have a quilt in mind for this collection. The finishing on her fabric is just wonderful – it feels heavier and smoother than most of my other fabrics.
The stash is probably going to grow some more this month. We have a trip planned to Sew Be It up in Ringgold and I can’t imagine coming home empty handed : )
Mug Rugs!!
We outgrew this site and have moved on to bigger and better things, so click the image below or look for us atwww.makingmodernmemories.com
The Atlanta Modern Quilt Guild had our first holiday ‘party’ yesterday, and we had such a good time! It makes us think we should consider having good food and swaps at every meeting : )
We all made a mug rug (think small placemat, big enough to rest your cup of coffee or tea and a few cookies or snacks) and then did an anonymous swap. Here’s a pic of all the mug rugs together (pic courtesy of Melinda):
I was thrilled to receive a beautiful mug rug from Ellen. Ellen is one of my most favorite quilters in the group, mainly because our tastes seem to be very similar in design and fabric. I aspire to be as good as she is : ) She commonly uses a lot of aqua and orange, two of the most perfect color combinations ever!
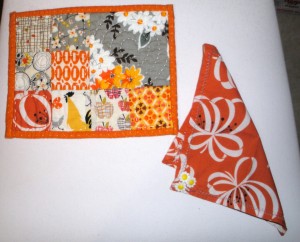
Ellen’s gift was wrapped in a beautiful orange print fabric, and inside were these two beautiful little goodies:
Not only did I get a beautiful mug rug, but I got a little napkin, too! Seeing the array of mug rugs was amazing. Every single one had it’s own personality, and we are getting to the point of knowing each other where we can almost pick out who did which item. It seems everyone loved making the mug rugs.
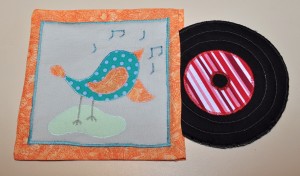
Now that we’ve made the exchange, I can finally post pictures of the one I made. I have to give Paul credit – apparently he was thinking about my mug rug project while he was driving one day, and came up with the idea of making it like a record album, where the record comes out of the album cover. Brilliant!
It took me about 4 or 5 tries to get it just right. Trying to figure out the best way to do the record was the most difficult part, but I finally figured it out. I really enjoyed it because I used skills I haven’t used in a really long time (i.e. satin stitching, applique, etc.).
Here it is, just the album cover by itself:
The record is attached to the inside of the cover, but the album pulls out as a place to rest your mug:
Here’s the back:
With a mug and snacks:
I’m excited to announce that this, or variations of it, will be one of the first items available in my Etsy store very soon. The album cover is customizable and will have several designs and graphics available.
What do you think?
Finally – the New Wave Quilt Top!!
We outgrew this site and have moved on to bigger and better things, so click the image below or look for us atwww.makingmodernmemories.com
Whew, it is so rare that I get to post twice in the same day (or same month for that matter), much less get to show off a finished quilt top. I’m excited to be posting this quilt top I just finished while Aaron is napping. It’s a gift, but the recipient won’t see it on this blog. I don’t usually post just quilt tops, only fully finished quilts, but this one has been a real stressor for me and I’m too excited to wait. I will likely use this quilt to learn how to longarm quilt at Red Hen in the coming weeks. If I know I won’t screw it up, that is!
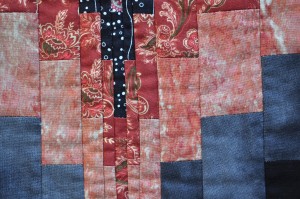
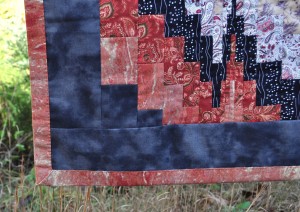
This is my second go at this quilt. It’s not an easy one, even though it looked like it would be pretty easy. Getting the angles JUST right and making the seams line up just right are terribly difficult. I ran into major trouble the first time I tried this quilt because as I was sewing the rows together, my seams were obviously out of whack. This one isn’t perfect, but it lined up beautifully. I’m contemplating going back to the original to see if I can repair it now that I’ve got some experience under my belt.
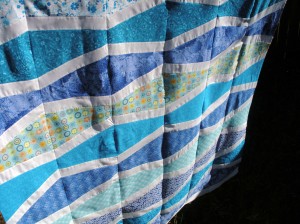
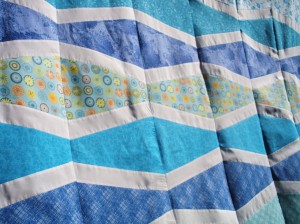
So anyway, here it is. The quality of the pics is really sad in my opinion; I just used the pocket camera for this since I was in a hurry. The finished quilt will get the big Nikon photo shoot.
This pattern is Elizabeth Hartman’s (Oh, Fransson) New Wave quilt:
Curved Piecing
A little over a month ago, we had our first Modern Quilt Guild meeting at our new meeting place, Tiny Stitches. During the class, someone spotted a beautiful quilt that one of our guild members made. Melinda is not only a member of our guild, but she also works and teaches at Tiny Stitches. The quilt is a beautiful curved piece quilt. Instantly, some of us were interested. So we signed up to take her class last week.
Melinda was very gracious, as Nic, Rae and I turned out to be the only students in the class. We appreciate that she followed through with the class and gave us extra attention!
I will admit, the curved part was rather intimidating. You only use a pin at the start and finish of each curved piece, and for someone who is probably over-zealous with pinning, this was a huge deal for me. Even Nic was sweating, and she’s a veteran quilter! But after a few blocks, it became easier and easier.
The quilt and lesson came from Pat Sloan’s book “I can’t believe I’m quilting beyond the basics”, and it’s the quilt featured on the front cover:
The next chance I got to practice these curved pieces was the following night. I didn’t want to wait too long, afraid I would forget what I’d learned. But instead, I found, interestingly, that my seams were lining better in most cases than in simple, square blocks. Maybe my technique is just getting better?
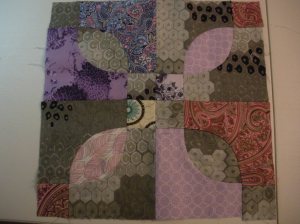
So here are the practice blocks I made in class and finished at home:
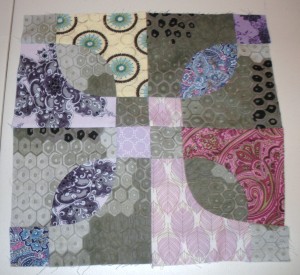
So, the thing is, being a modern quilter, I am more about organized color schemes and clean lines. So I decided to change it up and create a bit more of a predictable pattern. So here are the next two blocks I made. I think I’ll finish the quilt in this style instead:
As silly as it is, I am really proud of my color scheme. This is not normally something I would pick fabric-wise. I am not much into purple/orchid, and I’m most certainly not into pinks of any kind. But I’d been eyeballing that gray honeycomb looking fabric for a long time, waiting for the right opportunity to try it. It made a perfect background/main fabric for this pattern, so I decided to stick with complimenting colors that I wouldn’t normally use. I’m pretty happy with the turn out.
I’m not sure what will become of these blocks. I want to finish a quilt with it, so maybe it’ll be gifted to someone, or I’ll use it for a giveaway should I really start selling goods and promoting my blog.
*gasp* Finished Projects!
Yes, it’s true. I’ve actually managed to finish a thing or two. But in true I’m-a-busy-mom fashion, I finished them with no time to spare.
My quilt guild had a mini-quilt challenge, and the quilts were due yesterday. We shared our quilts at our meeting, and they will all be displayed for a month or so at Whipstitch. It’s our first big-deal event! I can’t even tell you how excited I was to see everyone’s finished quilt.
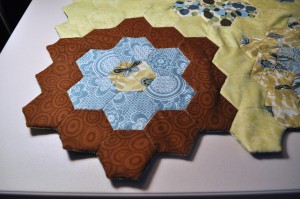
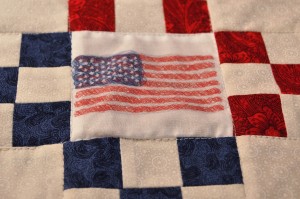
The hand-sewn hexagon quilt was technically finished over a week ago with the exception of having to sew my name label to the back. But the flag quilt – ugh. I don’t know why, but what I thought would be a simple, no-brainer quilt seemed to be a project that just wouldn’t end. It is not my best work, not by a long shot. I am not happy with the quilting or the binding, but it’s done and overall, I like it. I think it’ll hang in the living room when it comes home. The binding, by the way, was sewn on to the quilt about an hour before I had to leave the house. I think the problem was it is the smallest binding I’ve ever had to work with. So here’s the two quilts I contributed:
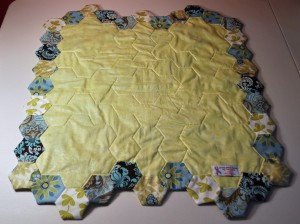
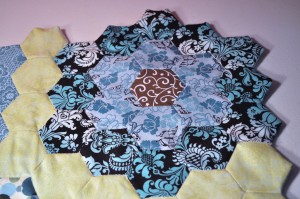
My hand-sewn hexagon quilt, which is a classic pattern/technique modernized. Each piece was made using freezer paper ironed on to the fabric pieces (temporarily) and then sewn together. I originally wanted to make our bedroom quilt out of this design, but I found a design we like better. So I took what I had made and put together a mini quilt (it measures about 26″) which I will hang in the bedroom.
Back of the hexagon quilt. I found a cool tutorial and used it to make the frame of the quilt.
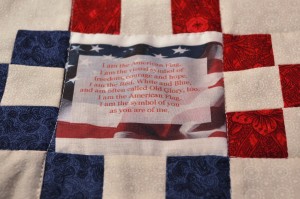
The Flag Quilt, which was inspired by a quilt from the “Pretty Little Quilts” book. This is the first time I used printable fabric (for the random graphics).
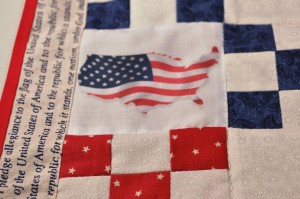
The border of the front and the backing are done in the repeating Pledge of Allegiance fabric, leftover from Aaron’s quilt I made last year. I love that fabric and glad I had a chance to use it again.
What I've Been Up To
I’ve been busy living life and doing things instead of writing about it, but it’s time to get back on the wagon. Here’s a short sketch of what I have been doing.
What I’ve Been Up To
I’ve been busy living life and doing things instead of writing about it, but it’s time to get back on the wagon. Here’s a short sketch of what I have been doing.
Quick Kitchen Improvement
Our over-crowded shelf in the kitchen gets a 10-minute makeover.





![1210 Mug Rugs[3]](https://patrioticquilter.files.wordpress.com/2010/12/1210-mug-rugs3.jpg?w=300&h=175)
